what finish to apply to bottom of farmhouse table top
I made a big ole mistake virtually a twelvemonth ago.

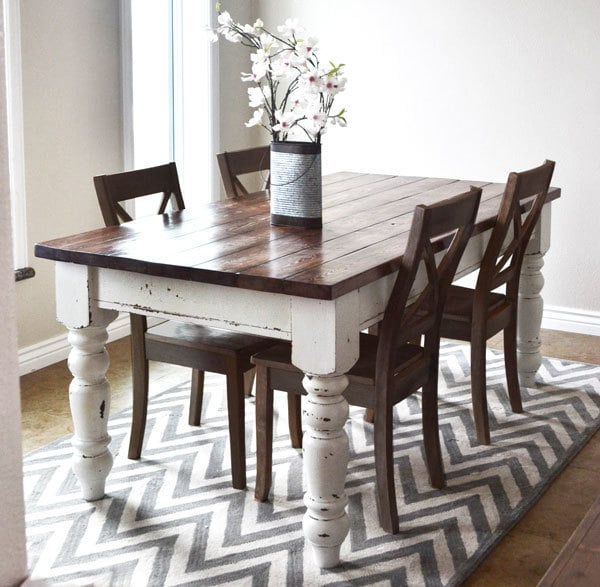
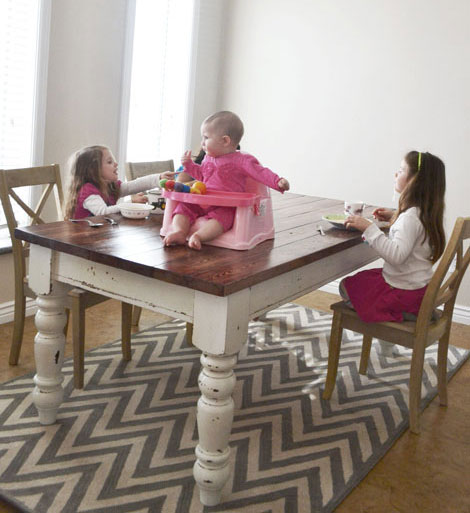
When I built this space saving and super functional dining table, white was the respond for the states. I reasoned white would make the infinite appear larger and brighter. And it did. I dear the white.
But hither's the big problem. I've never had a white tabletop before. I've always had woods tabletops.
Accept you had a white tabletop?
Perchance you are a better housekeeper than me.
Considering that white tabletop shows the tiniest mess. The nearly miniscule crumbs from the kid'due south snacks, even the teeniest speck of pepper becomes a very visible eyesore against the white tabletop.
At present that I have a white tabletop, I know first-manus how forgiving a wood grain is. It's similar having a forest flooring versus a white floor – you'll exist a slave to a white floor, panicking over a speck of dirt, chasing guests around with a broom and dustpan. But a wood flooring? Much more forgiving.
So when my sister, a very busy mother of three, asked me to make a table for her, I insisted on a wood tabletop. Not that she'due south messy – she's certainly non – but I'm a big fan of making things as easy as possible when it comes to housework.
So wood it is, but we as well wanted to make sure that the wood tabletop stands up to years of utilise and is cute. The end results of this cease are amazing. Anybody who comes over, comments on how beautiful this table is. And I know with the finish we put on information technology, this table will be beautiful and durable for many years to come!
For this mail, I partnered upwardly with the awesome folks over at Minwax to create a finish that is beautiful, durable and easy for you to replicate at home for your ain family unit. Thanks Minwax for bringing us this finishing tutorial!
Step 1
Set the Project
Believe it or non, this project starts out brand new! I wanted the summit to be super flat, so a plate would residual on top without rocking. So I spent quite a bit of time sanding the top with a random orbital sander, in the direction of the wood grain, using medium grit sandpaper. Y'all take to be super careful because it volition leave scars if you get against the grain.
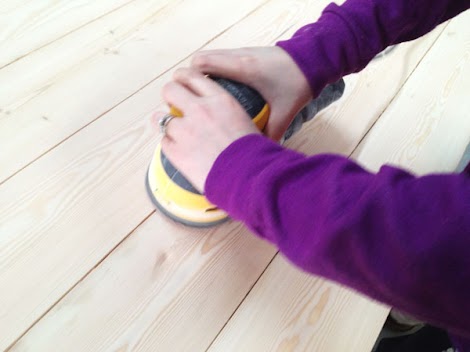
I followed the power sanding with quite a bit of sanding in the direction of the woods grain with a paw sanding block, starting with medium grit to friction match the sandpaper in the orbital sander, and so working my way downwardly to fine.
Sanding dust is the enemy, so I brushed the project off with a soft bristled castor, then vacuumed the entire area. And so I followed up with a quick wipe downward with a barely damp cloth.
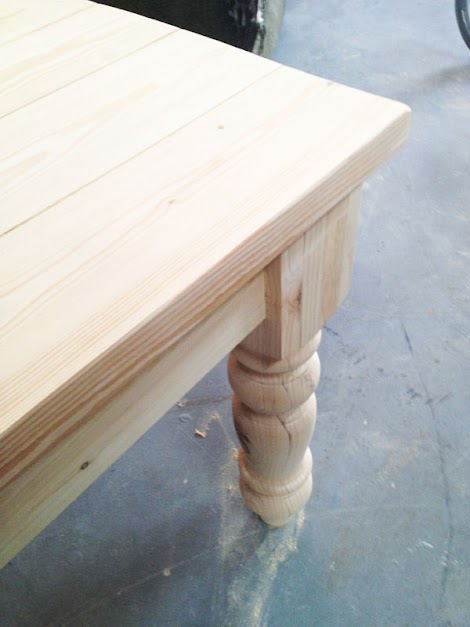
The tabular array is now ready for staining!
Pace 2 Instructions
Stain Application
Because the tabletop will not be painted over, I want the stain to go on super smooth and fifty-fifty. And then I applied Minwax® PreStain Wood Conditioner to the woods. I used my natural bristle castor, but you tin can too use a foam castor here.
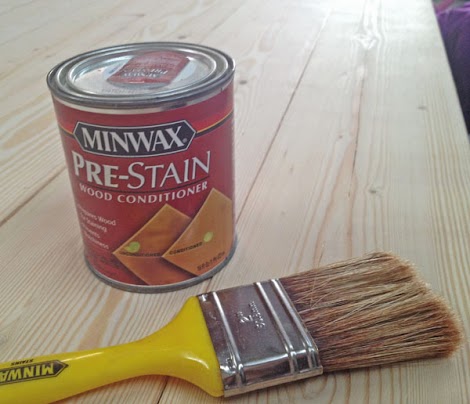
For Minwax® PreStain Forest Conditioner, I requite the wood conditioner about 15 minutes to soak in before starting stain application.
Yeah, I do accept a thing for Minwax® Wood Cease™ in Early American – hence the giant tin can!!! I had my sis help me out every bit we've got quite a fleck of tabular array to stain (and it'southward her table).
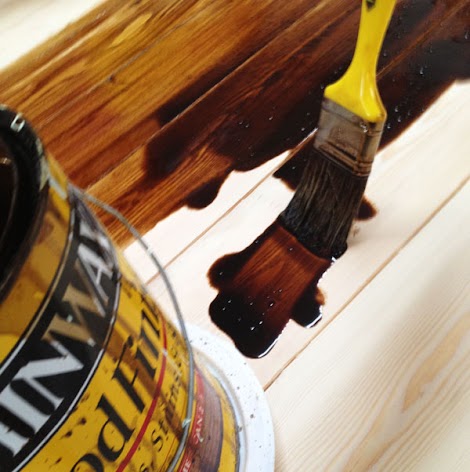
We brushed the stain on with a natural bristle castor.
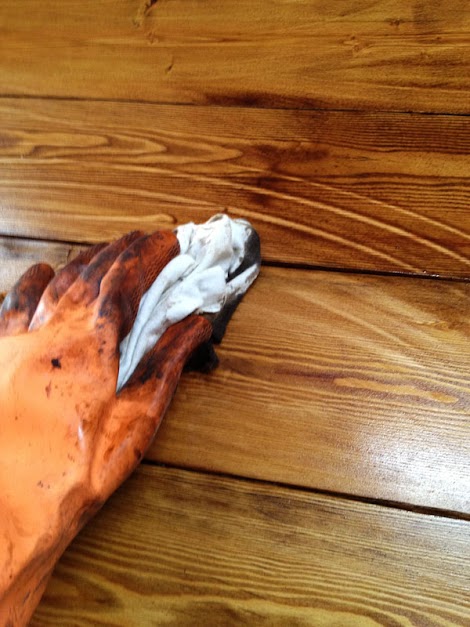
And and then allow the stain sit for a few minutes earlier wiping off. The stain went on really smooth and fifty-fifty because of the forest conditioner underneath. Isn't she pretty?
Simply my sis has nighttime espresso kitchen cabinets, and we wanted the tabletop to be a darker wood.
That's one of the actually cool things almost stain. If you want to deepen the color, you tin can! I beloved that most stain - you lot take so much command over the outcome of your project!
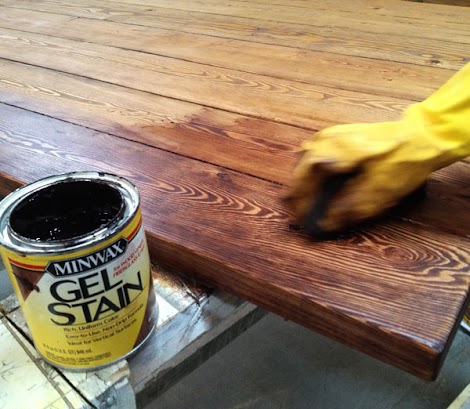
Once the showtime coat of stain was dry, we applied a layer of gel stain over top in one of my favorite colors - Red Elm. Gosh, I simply love that stuff!
Now that's the color nosotros were looking for!
We allow the stain dry for a day.
Now how to keep that beautiful stain color, even with years of utilize?
Next, we'll add together the protective top coat.
Stride 3 Instructions
Protective Peak Coat
I really honey working with Minwax® Fast-Drying Polyurethane and Minwax® Polycrylic® Protective Finish, just make up one's mind to apply Minwax® Water Based Helmsman® Spar Urethane for the tabletop. The chief reason is Helmsman® has superior durability for surfaces that are subject to dampness. Information technology stays flexible and holds up well in exterior elements, and is great for countertops and tables.
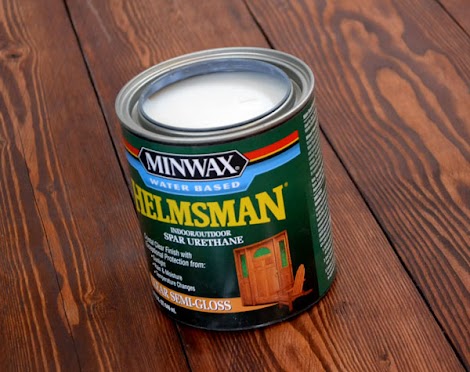
Merely what surprised me the almost was how like shooting fish in a barrel it is to use and how beautiful the it fabricated the forest!
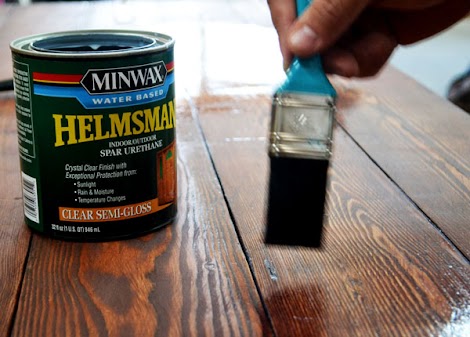
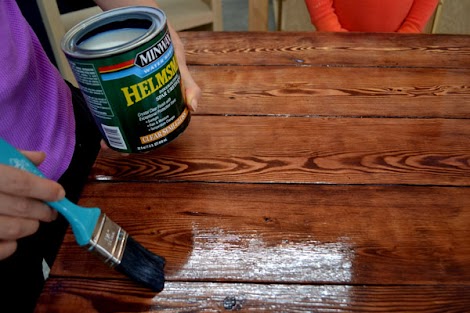
Commencement upwardly, I gave the can a expert stirring. And and so I started by applying a very thin glaze of the Minwax® Water Based Helmsman® Spar Urethane, this fourth dimension with a constructed brush. If yous utilize a natural bristle castor, the water will slap-up the bristles and you'll ruin your brush. If you don't want to switch out brushes, Minwax too makes an oil-based version too.
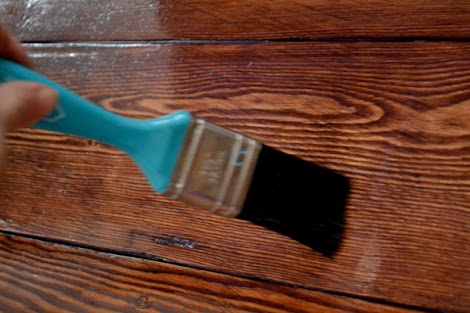
I let the first coat dry for a couple of hours, and then gave it a very light sanding with 220 grit sandpaper. And and then added a second coat.
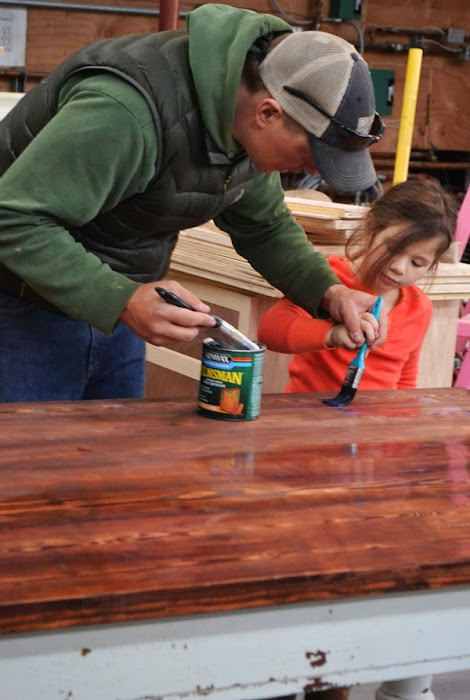
I was very impressed with how like shooting fish in a barrel the Minwax® Helmsman® Spar Urethane went on – like really expert boom polish! It was so like shooting fish in a barrel, we even let our kindergartner aid and she did a corking job
NOTE: If you allow your kids help, always go back and do a dandy brush glaze over superlative.
And then that coat dried for a couple more hours and I snuck out in my PJs and did a quick sanding (again with fine grit sanding block) and added another coat.
And then that dried, and nosotros repeated i terminal fourth dimension.
At present comes the actually actually actually tough part.
For normal peak coats, 24 hours is recommended before use. But with a tabletop, 72 hours is advised. The table was but so beautiful, I wanted to bring it over to my sister's house right away and give it to them!
It was tough, but we let the tabletop dry for the total 72 hours. What'southward iii days when they can enjoy the table for many many years to come?
Thanks Minwax for sponsoring this finishing tutorial and for making awesome products that make our furniture look so adept and stand up to this kind of employ!!!
Source: https://ana-white.com/blog/2013/05/staining-and-finishing-tabletops
0 Response to "what finish to apply to bottom of farmhouse table top"
ارسال یک نظر